这个词条关于创建新物种,添加到 Stellaris 中已经有的之外。This will cover the processes of portrait design, folder arrangement and more. As with empire modding some parts of this guide will describe fairly easy or even obvious things, however there are parts of species modding much more complicated or containing unexpected nuances.
In order to effectively create a new species a few tools are needed:
- Any photo editing software capable of supporting image transparency, such as Artcursors, Paint.net, or Photoshop. MS Paint does not support image transparency and cannot be used without conversion software.
- Either the ability to edit and save DDS files, or convert PNG or TGA files to DDS files.
- A picture or pictures of the species to add.
- A text editor. Notepad++ is recommended, but Notepad is fully capable of this.
Stellaris Mod Creation Menu[edit | edit source]
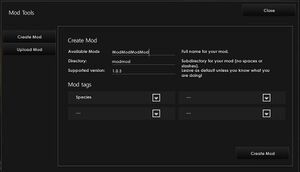
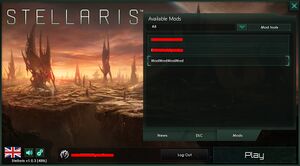
Open up the Stellaris Launcher. At the top right of the 'Mods' tab, click "Mod Tools". Click on the "Create Mod" tab that is to the left.:
- The first blank is for the visible name of the mod.
- The second blank is for the name of the actual mod file.
- The third blank is the supported version. This should already be filled out and do not change it.
- Below that is four available tags that that can be added. Use "Species".
Once the mod info is filled out, click the "Create Mod" button at the bottom right. This will create an empty folder with the mod name and a .mod file.
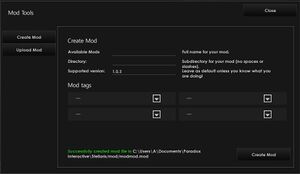
Mod file creation menu filled out with an example:
Some text should appear at the bottom of the window saying "Successfully created mod file in (MY DOCUMENTS PATH)\Stellaris\Mod\YourMod.mod".[1]
The text at the bottom contains the location of the mod file.
Going Into The Mod Files[edit | edit source]
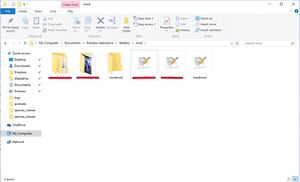
Go to the location of the mod files in your My Documents Folder.[1]
- Click on the text file that has the name of the mod and COPY that into the folder with the mod name.
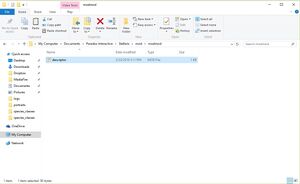
- Change the name of the .mod file copy to 'descriptor'.
- Open the folder with the mod name.
The folder should be empty (except for the copy of the mod file) and ready to fill with the necessary files to create the new species.
Keep this folder open for easy access.
Manual Species Creation (Vanilla Rendition Replacement Version)[edit | edit source]
Having created a new MOD file, proceed with creating the Species. The instructions below will teach you how to append your new Species to an existing Species Class already found in the game.
| WARNING: Editing the default species classes overwrites every other mod that alters the same! This means that no other Species can be added, and any future Vanilla rendition update will be glitched! In order for your species to exist alongside any other custom species, one must create an unique, separate species class! Add an unique, separate species class using the custom species creator instead. |
Creating the Mod File Structure[edit | edit source]
- Go to the location of the mod files that you generated in the steps above.
- On Windows, enter the My Documents folder.[1]
- In the My Documents folder, enter the Paradox Interactive folder. In Paradox Interactive, enter the Stellaris folder. In Stellaris, enter the Mod folder.
- Create a new folder in the mod folder named 'common'
- Create a new folder in the mod folder named 'gfx'
- In the main Stellaris window, open 'common' and copy the following folder to the Mod window:
- species_classes
There should be exactly one file in the folder you copied.
- Change that file’s name from 00_species_classes to anything you choose. DO NOT name it "00 or 01_species_classes" or any other numerical variant.
- Open the new file.
- Decide now whether the new species is going to be a mammal, reptile, avian, arthropod, mollusk, or fungus.
- Let’s say you've chosen to add a new fungus. Scroll down through the file until you find the section that reads:
FUN = {
 	portraits = {
 		"fun1"
 		"fun2"
 		"fun3"
 		"fun4"
 		"fun6"
 		"fun7"
 		"fun8"
 		"fun9"
 		"fun10"
 		"fun11"
 		"fun12"
 		"fun13"
 		"fun14"
 		"fun15"
 	}
 	custom_portraits = { # add additional portraits when customizing species
 		trigger = {	local_has_dlc = "Creatures of the Void Portrait Pack"	}
 		portraits = {
 			"fun16"
 		}
 	}

 	graphical_culture = fungoid_01
 	move_pop_sound_effect = "fungoid_pops_move"
 }
- Now paste the following section in right ABOVE the line that says "graphical_culture = fungoid_01" and change myspecies1 to the name of the species:
custom_portraits = {#add additional portraits when customizing species
 		trigger = {	always = yes	}
 		portraits = {
 			"myspecies1"
 		}
 	}
| WARNING: DO NOT NAME YOUR PORTRAIT "MYSPECIES1" OR "MYSPECIES". This is the system default! An unique name must be used to prevent incompatibility with other Mods! |
- Don't worry about what "trigger = {always = yes}" means, it just ensures that you don't need any special DLC or other requirements to use this portrait.
- Save and close the file.
Next step: In the mod folder navigate to the main directory and open the 'gfx' folder.
- Create a new folder named 'models' and open it.
- Create a new folder (inside of 'models') and name it 'portraits' {'gfx\models\portraits'} – this is where you will put the picture of the species.
- Inside of the 'gfx' folder create a new folder named 'portraits' then open that folder ('gfx\portraits') and create ANOTHER folder named 'portraits' ('gfx\portraits\portraits')
- Keep the folder 'gfx\models\portraits' open.
Adding The Portrait[edit | edit source]
Making The Portrait In Photoshop or Paint Net[edit | edit source]
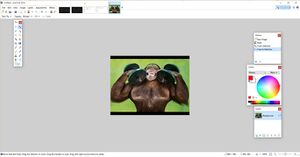
Open up the photo editing software
- Open up the picture or photo that you will use as the species’ picture.
NOTE: You should use the highest quality image possible for this. If you have to shrink it down a bit you will lose some detail.
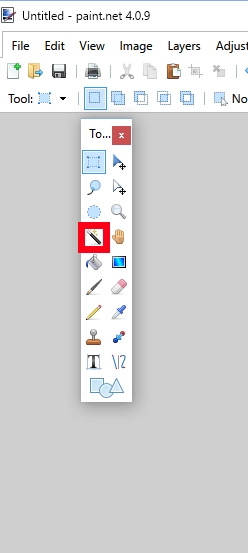
- From the left hand side select the tool that looks like a magic wand (left column, 4th down)
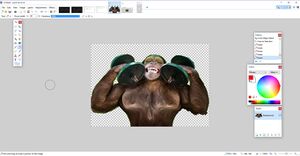
- Erase the background – this may take some experimentation, using the various tools and making some adjustments.
TIP:Using the eraser tool (pink and white eraser icon, right column), set the 'hardness' to about 20% and fade the edges of the portrait so that no hard edges remain (edges without blending like this tend to look really harsh – you'll probably need to experiment with lots of different techniques to achieve something that looks good.)
- Once you are satisfied with the portrait, resize it to a maximum of about 400 pixels in height (any higher and you run the risk of the portrait going out of frame in the game).
- Save the portrait as a DDS image with a memorable name (DO NOT name the file "MYSPECIES"or any variant) in the 'gfx\models\portraits' folder.
- Now save the portrait in the main mod directory with the same name (make sure to save it as a JPG image)
- Now close the photo editing software and open up the Mod’s 'gfx\models\portraits' folder to ensure that the species’ portrait is there.
- Check in the main mod directory.
Adding The Portrait to the Mod[edit | edit source]
- Open up your Mod’s 'gfx\portraits\portraits' folder. It is located in the My Documents folder by default.[1]
- Copy the file named '00_portraits' to the mod’s 'gfx\portraits\portraits' folder.
- Rename the file as to anything you wish. DO NOT use "00_portraits" or any numerical variation of the same.
- Open the file.
- Delete everything and put in the following lines:
portraits = {
myspecies1 = { texturefile = "gfx/models/portraits/X.dds" } }
- Replace X.dds with whatever you named your portrait in the previous step.
Save the file and close it.
Naming Your Species[edit | edit source]
| This applies ONLY to UNIQUE Species Classes. |
All Species added into the game must be named separately. Failure to do so will cause their names to be blank in the Species list.
If you used the method that appends a Species to the Vanilla rendition Species Classes, skip this step.
- In the root of your Mod’s folder, create a folder named "common", in all lowercase.
- In the "common" folder, create a folder named "species_names", in all lowercase.
- In the "species_names" folder, create a new TXT file. Name it anything you wish.
Inside the text file, paste the following:
X = {
 	Y = {
 		name = NAME
 		plural = PLURAL
 		home_planet = "HOME PLANET NAME"
 		home_system = "NAME OF STAR HOME PLANET IS IN"
 		name_list = "Z"
 	}
 }
Each entry is a key corresponding to a key that Stellaris will read when it generates a Species. Each of the five categories, left of the equals sign, must be lowercase!
- "Name" is self-evident. This is what the Species is called.
- "Plural" is the plural name of the species. This is used when multiple instances of one species are addressed collectively. (For instance, the creature called a "turtle" has the plural of "turtles".)
- "Home_Planet" is the first planet this Species starts on when the galaxy is randomly generated.
- "Home_System" is the star the Species’ first planet orbits around when the galaxy is randomly generated.
- "Name_List" is the series of first, last, and full names given to individual Leaders of this Species. These are found in the "name_lists" folder in the "common" folder of Stellaris.<ref name="STEAMDIRECTORY">By default, "Stellaris" is located in a certain area depending on what Launcher it is equipped with. For the Steam Launcher Program, it is found in the Steam entry thirty-two bit program directory.
The address to this is "C:\Program Files (x86)\Steam\steamapps\common\Stellaris" .
| NOTE: If you want to use the spacebar and include two words, QUOTATION MARKS must cover them! ("name = "Turtle Mushroom" and not "name = TURTLE MUSHROOM"!) |
- The X variable represents the Species Class of the creature. It must match the name of the Species Class found in the "species_classes" folder.
- The Y variable is the unique category for that series of names. Y can be replaced by anything, as long as it is unique, does not have any spaces or special characters (e.g. punctuation or any symbol except the underscore), and does not repeat.
In the example to copy and paste, remember to retain the quotation marks for Planet Name, System Name, and Name List!
Species Class Localization[edit | edit source]
| This applies ONLY to UNIQUE Species Classes. |
- This section governs the required Localization to properly render a Species in-game. For the actual creation of Localization files, not discused here, refer to the instructions concerning Localization itself.
Every Species Class includes Localization for use in dialog. This is found in the "localisation" folder of your Mod or of Stellaris. Species Class Localization allows for the game to properly insult and demean your species’ appearance, organs, appendages, mouths, and existence.
- At the top of the Localization file, type "l_english:", all lowercase. REMEMBER THE COLON. (If you chose a different language, use it instead.)
- Every entry after the "l_english" command must begin with a blank space.
Now, paste the following code into your YML file, overwriting it.
l_english:
 CLASS:0 "X"
 CLASS_desc:0 "A creature's Species Class has no effect on your Empire, but a X may consider other X's to be less alien than creatures of other Species Classes."
 CLASS_plural:0 "X"
 CLASS_adj:0 "X"
 CLASS_insult_01:0 "X"
 CLASS_insult_02:0 "X"
 CLASS_insult_plural_01:0 "X"
 CLASS_insult_plural_02:0 "X"
 CLASS_compliment_01:0 "X"
 CLASS_compliment_plural_01:0 "X"
 CLASS_spawn:0 "X"
 CLASS_spawn_plural:0 "X"
 CLASS_sound_01:0 "X"
 CLASS_sound_02:0 "X"
 CLASS_sound_03:0 "X"
 CLASS_sound_04:0 "X"
 CLASS_sound_05:0 "X"
 CLASS_organ:0 "X"
 CLASS_mouth:0 "X"
 CLASS_hand:0 "X"
Replace "CLASS" with the Species Class of your Species that is found in the folder "species_class", nested in the "common" folder.
What each key represents should be obvious. Every key can be entered to read anything.
- The first line is the name of the Species Class (e.g. "Mammalian, Fungoid"). Only one.
- "CLASS_desc" is the generic description. In the Vanilla rendition of Stellaris, every Species Class’ description says the same thing.
- "CLASS_plural" is the plural name of the Species Class (e.g. "Mammalians, Fungoids"). Only one.
- "CLASS_adj" is the adjective of the Species Class. (e.g. "a Mammalian obsession", "a filthy Molluscoid"). Only one.
- "CLASS_insult_X" denotes a diplomatic insult at one member of that Species Class (e.g. calling an Insectoid a "bug"). Any number of Insults can be written, as long as they have a plural complementing them. Simply increment the number.
- "CLASS_insult_plural_X" denotes a diplomatic insult to multiple members of that Species Class (e.g. calling a group of Insectoids "bugs"). Any number of Insults can be written, as long as they have a singular form complementing them. Simply increment the number.
- "CLASS_spawn" denotes the offspring of the creature (e.g. "spore" for Fungoid, "cub" for Mammalians). Only one.
- "CLASS_spawn_plural" denotes a group of a Species Class member’s offspring (e.g. "babies" for Humanoids). Only one.
- "CLASS_sound_X" denotes descriptive noises (e.g. "stupid Robot, will you stop that beeping"). Five must be written.
- "CLASS_organ" denotes a body part or aspect of the Species Class member (e.g. "just looking at you makes my stomach churn"). The organ does not have to be digestive, or even an organ, though choosing something like "hair" sounds odd when a creature says your Species it churn.
- "CLASS_mouth" denotes the mouth the Species Class member uses for eating (e.g. "look at that thing on your face, is that supposed to be a jaw").
- "CLASS_hand" denotes the appendage a Species Class member uses to pick up things (e.g. "our Federation is surely in capable paws). If the Species Class does not have hands, use a substitute
| WARNING: Always remember the initial space and the colon after the key. Do not delete the quotation marks and never use quotation marks inside of the aforementioned quotation marks! Use four apostrophes instead, or this will break the localization! |
Adding the MOD Files[edit | edit source]
- Enter the Stellaris Mod folder
- In the folder, search for the MOD file generated. This is the MOD file that is present with any other MOD files downloaded from the Steam Workshop.
- Double-click the MOD file.
Inside you should see something resembling the following:
 	name="MOD NAME"
 	path="mod/MOD FOLDER NAME"
 	tags={
 		"Species"
 	}
 	supported_version="CURRENT GAME VERSION"
- Here, add your thumbnail if you wish. (This is optional.)
Now add a line above 'supported version':
 	name="MOD NAME"
 	path="mod/MOD FOLDER NAME"
 	tags={
 		"Species"
 	}
 	picture="X.jpg"
 	supported_version="CURRENT GAME VERSION"
Obviously, change the name of "X.jpg" to whatever the portrait was named.
Now, a Descriptor MOD File must be created.
- Copy, not cut, the MOD file you just finished editing.
- Open the folder of the Mod that you have created and paste it there.
- Rename the copied MOD file to "DESCRIPTOR.MOD". It MUST read "DESCRIPTOR.MOD", in all lowercase.
Uploading The Mod[edit | edit source]
Test The Mod[edit | edit source]
Close down all of the windows and launch Stellaris.
- Click on the 'Mods' tab in the launcher.
- You should see the mod’s name in the list. Click on it.
The mod should now be highlighted (slightly lighter colored corners than before)
- Click play
- Create a new empire, then under 'Appearance', in the Fungoid (or whichever you picked) find the new portrait
Once you've tested you portrait in game (you can always make changes to the "gfx/models/portraits/X.dds" to get a better result) it’s time to publish the mod.
Stellaris Mod Upload[edit | edit source]
Close all windows and programs – You don't want anything interfering with this next step.
- Go to the 'Upload Mod' tab in the Stellaris launcher, under the "Mod Tools" button from the 'Mods' tab.
- Click on 'Upload Mod' then find the mod in the list (it’s a grayed out list) and click it, then click on 'Fetch Info'
- It should say "Mod does not exist on Steam. Will create new mod."
- Click 'Upload' in the bottom right corner.
- Wait.
If you've done everything right you will be rewarded with a message "Mod uploaded okay."
Steam 创意工坊[edit | edit source]
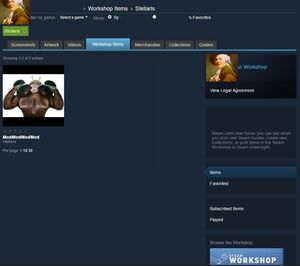
前往 Steam 创意工坊页面。单击模组然后编辑描述。
参考资料[edit | edit source]
外部链接[edit | edit source]
- Stellaris Species C6 Mod,Stellaris 制作组官方公告 – Trailer(Holiday Special – December 23, 2021)
| 帝国 | 帝国 • 思潮 • 政府 • 国民理念 • 起源 • 承诺 • 议程 • 传统 • 飞升天赋 • 法令 • 政策 • 遗珍 • 科技 • 自定义帝国 |
| 人口 | 岗位 • 派系 |
| 领袖 | 领袖 • 领袖特质 |
| 物种 | 物种 • 物种特质 |
| 行星 | 行星 • 行星特征 • 轨道矿藏 • 建筑 • 区划 • 行星决议 |
| 星系 | 星系 • 恒星基地 • 巨型结构 • 虫洞 • 星门 • 地图 |
| 舰队 | 舰队 • 舰船 • 部件 |
| 地面战 | 陆军 • 轰炸姿态 |
| 外交 | 外交 • 联邦 • 星海共同体 • 评价修正 • 宣战理由 • 战争目标 |
| 事件 | 事件 • 异常现象 • 特殊项目 • 考古遗址 |
| 游玩 | 游玩 • 定义 • 研究 • 经济 • 游戏开局 |
| 动态修改 | 动态 • 指令效果 • 触发条件 • 作用域 • 修正 • 变量 • AI |
| 媒体/本地化 | Maya 导出器 • 图形 • 肖像 • 旗帜 • 事件图片 • 界面 • 图标 • 音乐 • 本地化 |
| Other | 控制台命令 • 存档编辑 • Steam 创意工坊 • 模组制作教程 |
